How to make a collage of pictures: App for making a collage
Create standout collages in minutes with easy tools. Learn how to craft eye-catching layouts that boost your social media presence and wow your followers.
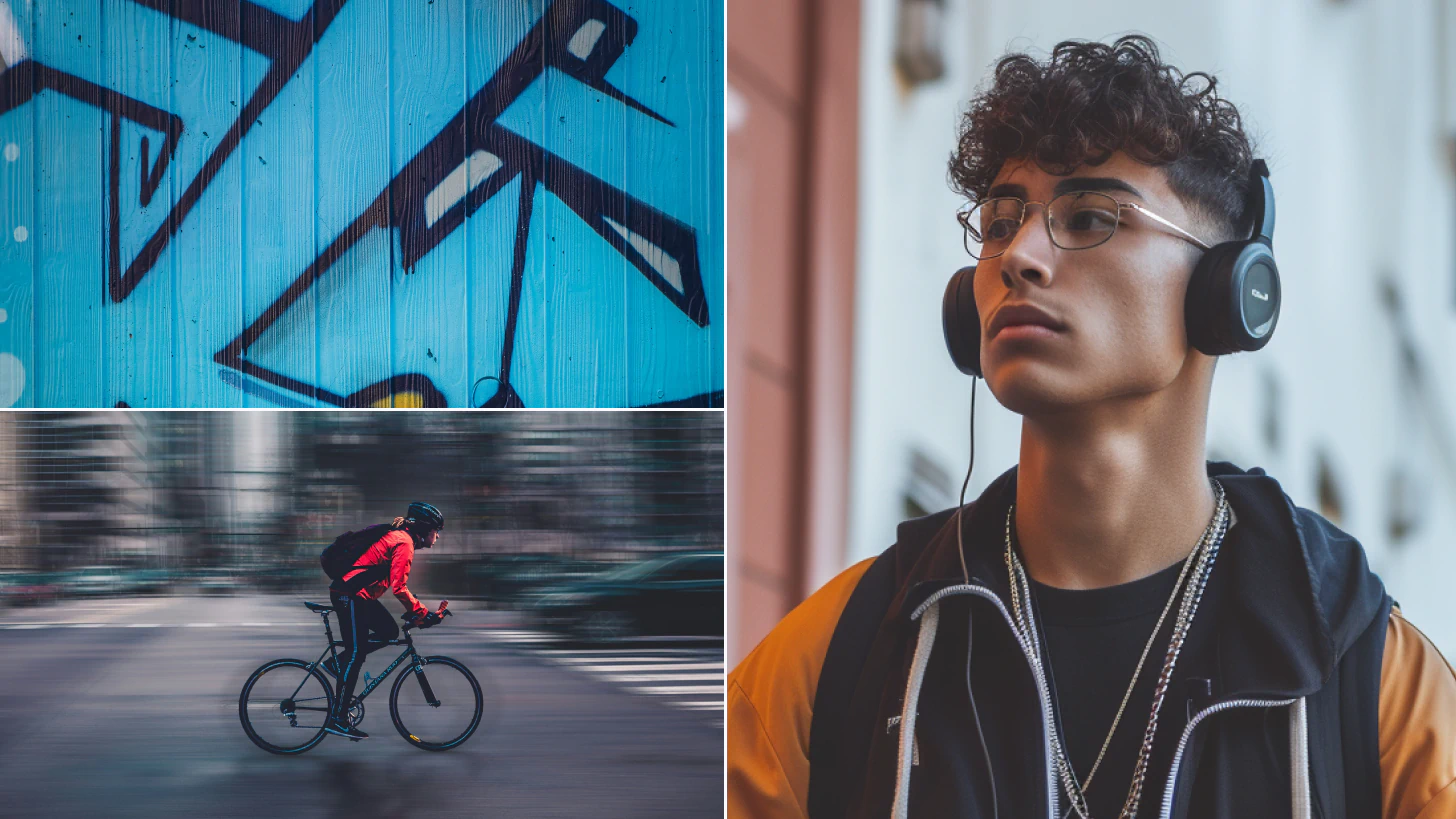
Collages are super popular types of social media photos. Whether you decide to make one for your friend’s birthday or to show off your most recent vacation, the aim is to tell a story through a unique, personalized montage.
However, in today’s busy digital world, there are so many creators crafting similar content. This makes it important to use a tool that can help you build artistic, eye-catching collages that stand out from the rest for maximum likes, comments, and shares.
{{cta-banner-images}}
Best app for making a collage
Creating a collage can be tricky without the help of a simple, intuitive tool. There are several options on the market, but figuring out how to use a collage maker app can take time. Some interfaces are complex and even after you’ve mastered them, you can end up with a basic collage that looks amateur and lackluster.
That’s where Photoleap, a photo editing app for iOS, comes in to reframe your perspective. Our dynamic, built-in Collage feature makes the collage-building process straightforward, efficient, and effortless.
How to make a collage of pictures with Photoleap
Working out how to make a collage with a new app can be daunting, but it couldn’t be easier with Photoleap. All you have to do is follow these 7 steps to start experimenting today.
1. Download Photoleap and sign up
Firstly, download Photoleap on your iPhone from the App Store. Open the app and sign up for a free trial using Google, Facebook, or Apple. This will last for seven days with an option to upgrade to a paid monthly or yearly plan at the end.
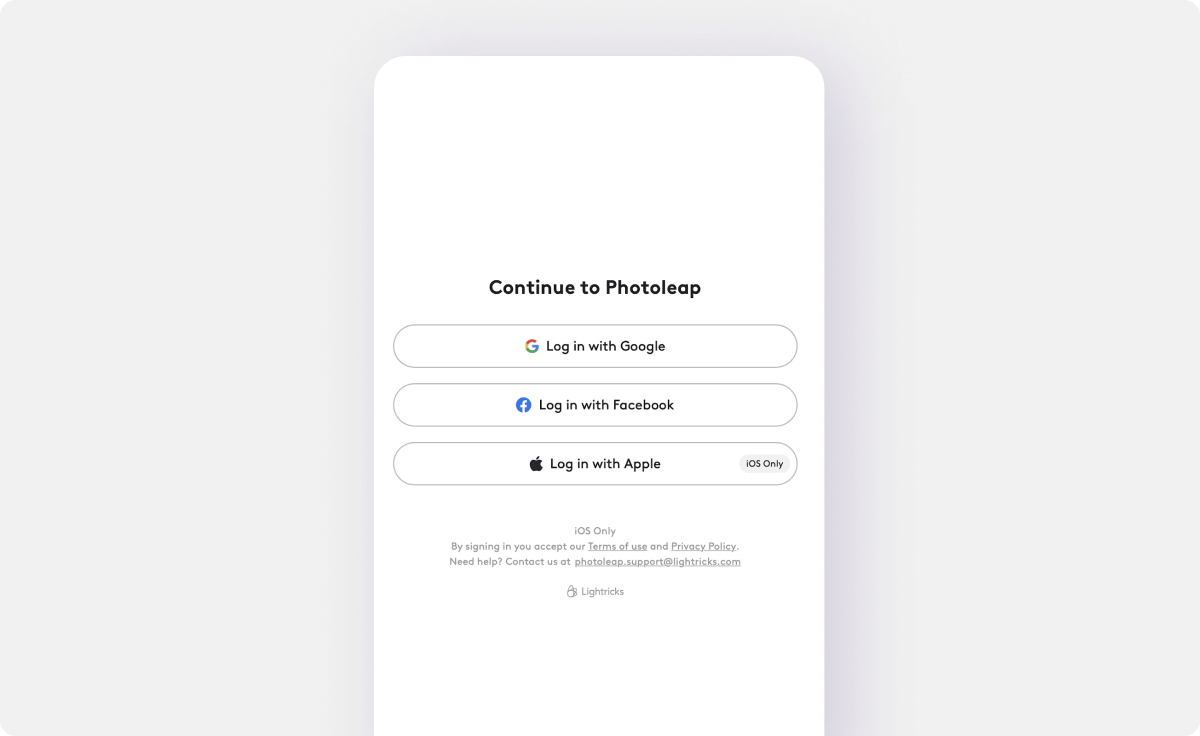
2. Select the Collage feature
Once you’re set up with Photoleap, it’s time to unleash your creativity! Tap the “Collage” button at the top of the first screen to get started.
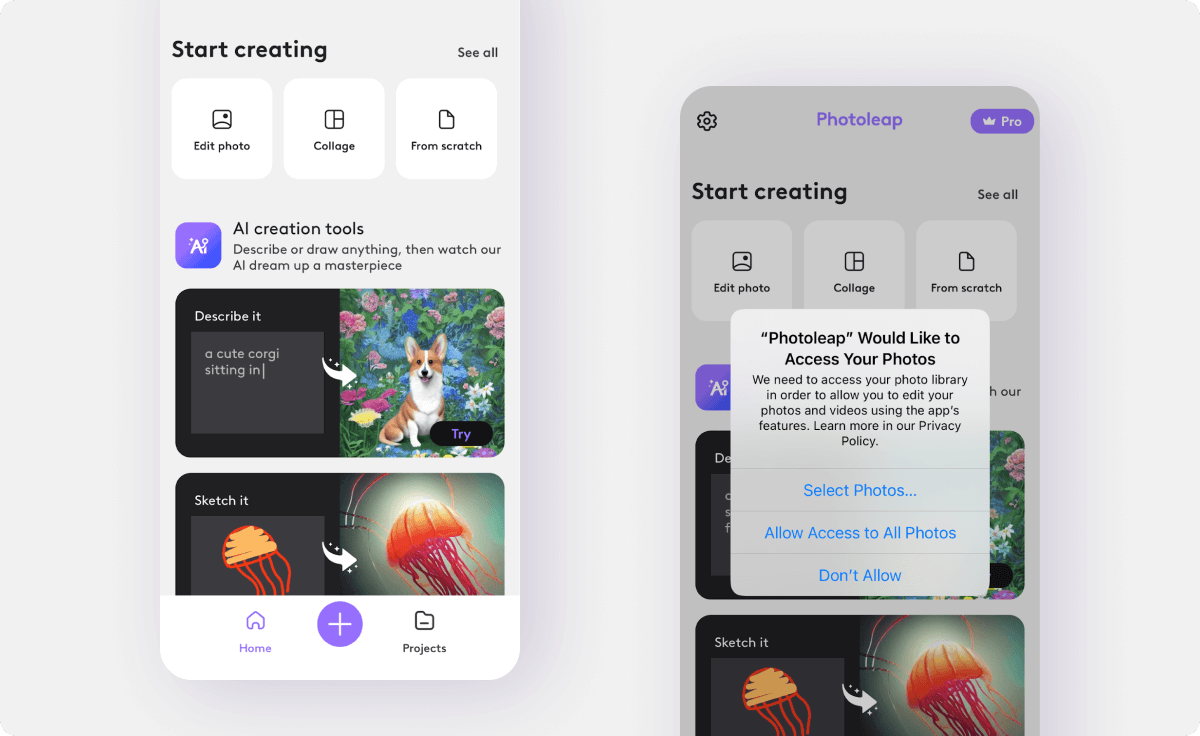
Photoleap will ask to access your photos. Select “Allow Access to All Photos” before you can choose the photos you’d like in your collage. Keep in mind that you will be asked to import six photos.
{{cta-banner-images}}
3. Editing your picture collages
Photoleap will place your selected photos in a three-by-two collage but you don’t have to stick with this design. To explore other templates, tap the “Grid” button in the bottom menu.
Although you’ll be asked to import six photos initially, you can now choose a template that only features two, three, four, or five photos. Alternatively, there are various options if you’re set on using all six.
Scroll along the bottom and play around with different collages until you find a layout that brings your vision to life. There are designs that let you hone in on one image, change the shape of multiple images, or use diagonal lines to add movement to your collage. The sky’s the limit!

4. Switch specific photos
Not a fan of the positioning of a particular photo? No problem—swap it out with another one by tapping the photo and tapping again to use the “Replace” feature. Then choose the preferred photo from your camera roll.
Note, you can also access the “Replace” feature by tapping the back arrow button on the left of the “Grid” menu and selecting “Image” from the main menu.
If the position of each photo needs a little tweaking, tap on a certain photo in your collage and drag it where you’d like. You can move it left, right, up, or down to center your subjects and highlight the best elements of your photos. You can even zoom in and out on your subjects to increase their visibility.
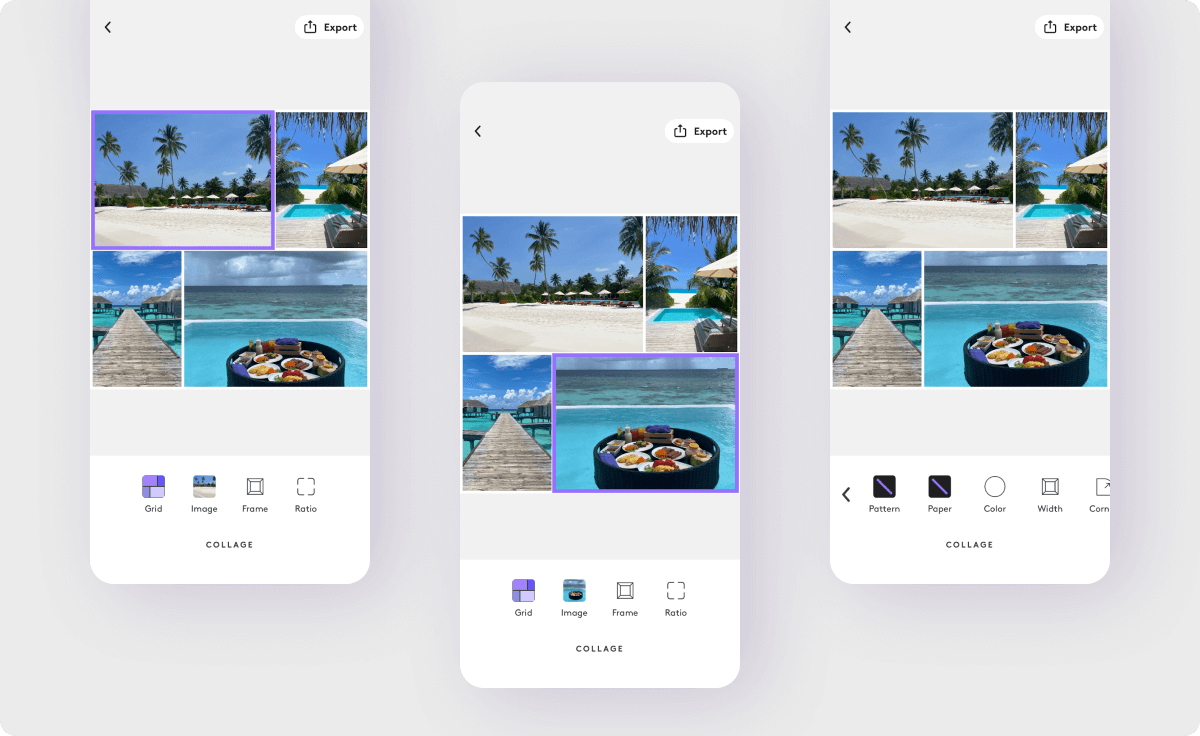
5. Pick your favorite frame
The next step in learning how to make a collage that transforms your social media content is to choose a frame. If you’re short on time, you can skip this step (although, we wouldn’t recommend it as this is the fun part!).
There are various ways to level up your collage by tapping the “Frame” button from the main menu.
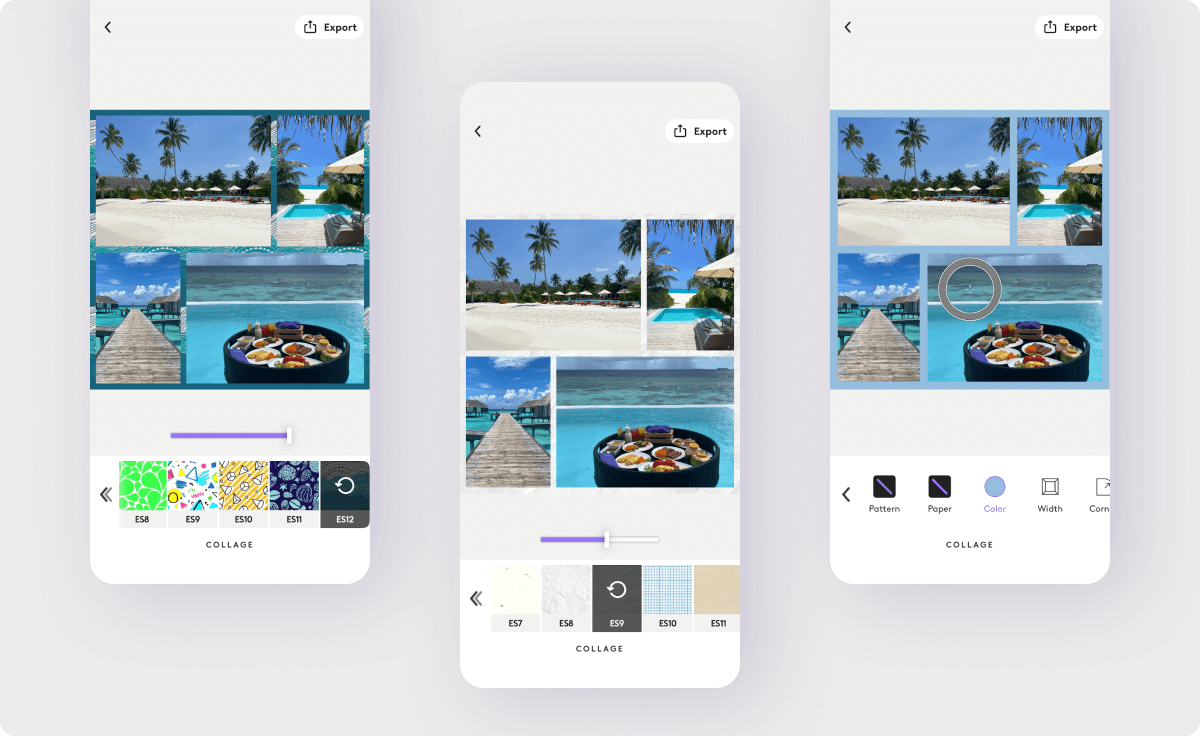
- Pattern: Choose a collage background that makes a big picture statement using the “Pattern” selection, including everything from floral to retro, and geometric to festive. Drag the sliding bar from right to left to zoom in and out on the background.
- Paper: Similar to “Pattern,” tapping “Paper” allows you to pick a paper-themed texture for your collage background and adjust its opacity using the sliding bar.
- Color: Hit “Color” to choose a different color for your frame. Find pre-selections by sliding along the color bar, or pick from a spectrum by tapping the color wheel. You can even tap the pipette icon to pick up a color from your photos to use as the frame.
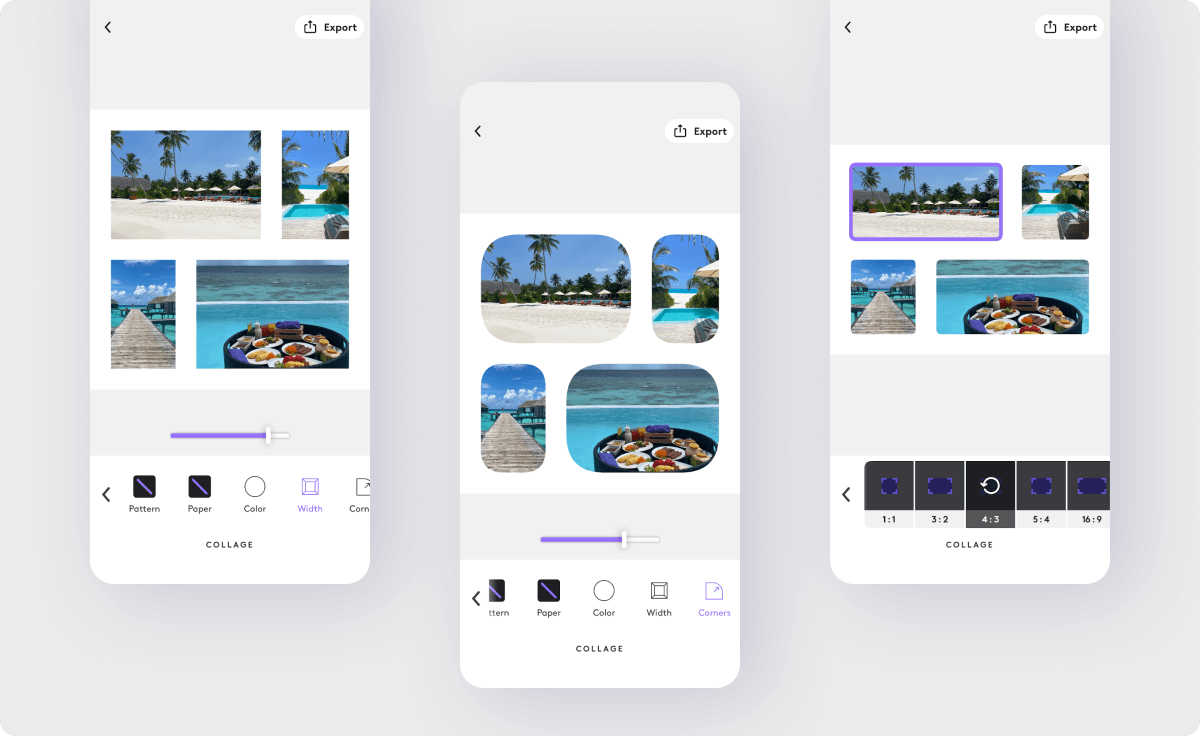
- Width: Try the “Width” button to adjust the thickness of your frame by dragging the slider from left to right. If you want to add text later, you may decide on a thicker frame so you have space to insert text.
- Corners: This option allows you to round the corners of the photos in your collage using the sliding bar. The further right it is, the more rounded the corners will be.
6. Select your ratio
You may find that you want to post your collage on your Instagram feed and the 1:1 aspect ratio is ideal for this. On the other hand, you could choose to adapt it for a landscape purpose, such as a Facebook post or Twitter cover photo.
In this case, tap the “Ratio” button from the main menu and select the desired aspect ratio. Need to adjust the positioning of each photo? Just tap and drag each photo to where you’d like it to be (as discussed in step #4).
7. Export your collage
Ready to wow your audience? The final step when it comes to how to make a collage using Photoleap is to export your image. But first, you have a couple more options.
Tap “Export” in the top right corner to use the “QuickArt” and “Advanced” features.
- QuickArt: This button allows you to add quirky effects to your collage to create something truly extraordinary, from Dispersion to Surreal Sky, and Paint Booth to Color Pop. There’s no end to your imagination!
- Advanced: Tapping this button takes you to the main Photoleap editing menu where you can tweak your collage further in terms of text, filters, brushes, and retouches.
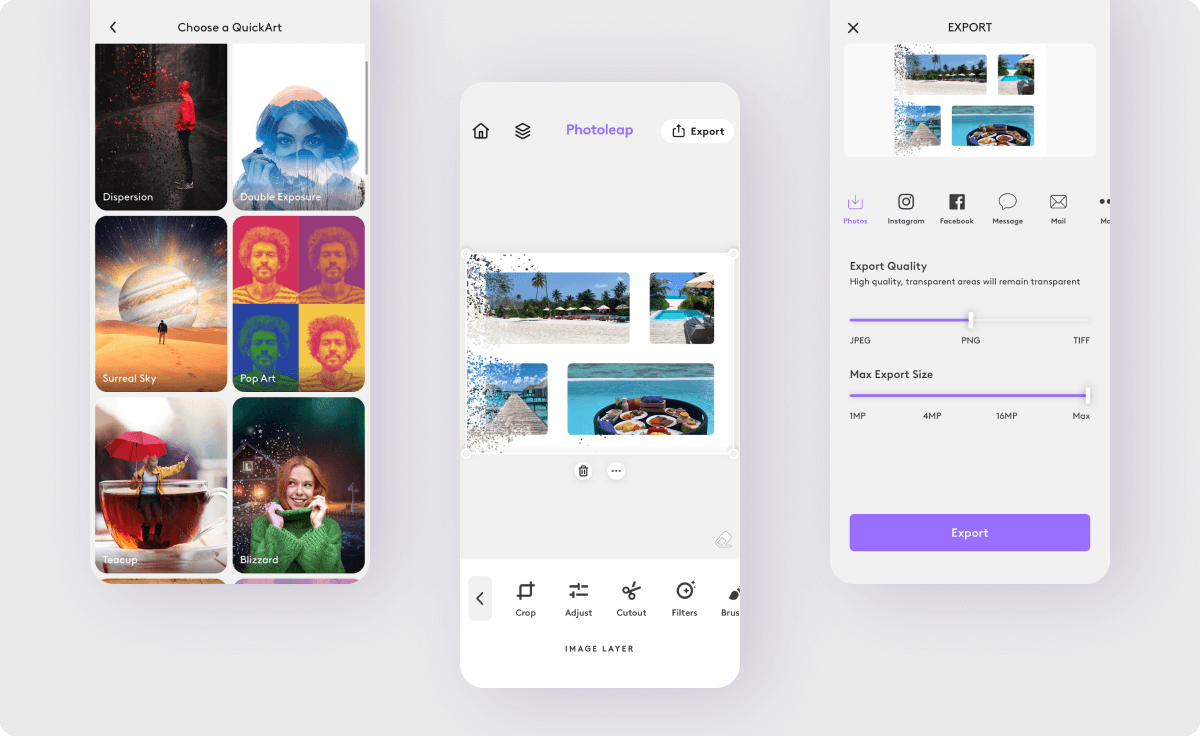
From the “Export” menu in the Collage editor, you can download your masterpiece to your camera roll in one tap using the “Save” option. Alternatively, select “Share” to adapt the file type and size before saving it, messaging it, or uploading it directly to social media.
Creativity in the palm of your hands
You don’t have to build boring collages using tools that limit what you can do any longer. Photoleap is on hand (literally) to help you reach your creative potential with collages that are easy to make, yet attract the utmost attention.
What do you have to lose? Try it now!
 Tutorials
AI color restoration: How to color old photos
Bring black and white photos to life with a burst of color. Relive your favorite memories in vibrant detail using powerful AI colorization tools.
 Tutorials
Photo stretcher app: How to stretch a photo
Learn how to stretch and expand your photos without losing quality. Easily resize images to fit your desired dimensions while keeping them sharp and clear.
 Tutorials
Model headshot pictures: How to take headshots for modeling
Create captivating model headshots with advanced editing tools. Enhance lighting, retouch details, and craft a standout look that's ready for any portfolio.


.svg)
